I love making Valentine’s Day bark because it’s the perfect sweet treat to celebrate love and chocolate. With simple ingredients like dark chocolate, white chocolate chips, and colorful sprinkles, it’s not only delicious but also really pretty. This easy recipe is great for gifting, parties, or just having a fun snack to share. I like to customize mine with candy hearts, pretzel pieces, or even pink candy melts to make it extra festive. You can make it ahead, store it in an airtight container, and enjoy a homemade Valentine’s treat that’s quick, fun, and budget-friendly!
Jump to RecipeTable of Contents
What is Valentine’s Day Bark?
Valentine’s Day Bark is a delicious and festive treat made from layers of chocolate topped with colorful decorations. It’s a simple candy bark recipe that’s perfect for gifting or enjoying with loved ones. The bark typically features a base layer of melted chocolate, like dark, milk, or white chocolate, enhanced with festive sprinkles, candy hearts, or other fun toppings. It’s easy to customize with your favorite ingredients, making it a go-to recipe for Valentine’s Day.
Ingredients Overview
Valentine’s Day Bark uses simple ingredients you can find at your local grocery store. Here’s a breakdown of the common components:

- Chocolate Base
The foundation of Valentine’s bark is usually made with a mix of chocolate options. Common choices include:- Dark chocolate for a rich, bittersweet flavor.
- Milk chocolate for a smoother, sweeter base.
- White chocolate chips or white candy melts offer a creamy, colorful option.
Use a microwave-safe bowl or a double boiler to melt the chocolate to perfection.
- Valentine’s Day Decorations
Add a splash of love to your bark with these festive toppings:- Conversation hearts add a nostalgic and playful touch to the bark.
- Festive sprinkles in red, white, and pink create a cheerful, holiday-themed look.
- Candy hearts or Valentine’s Day M&Ms are popular for their vibrant colors and sweet taste.
- Salty Snacks
A little salty adds contrast to the sweetness. Crushed pretzel pieces or thin pretzel sticks are often used for a crunchy twist. - Additional Candy Options
Personalize your bark with extras like pink candy melts, Oreo chunks, or mini marshmallows. These add texture, color, and even more sweetness.
All you need is parchment paper (or wax paper), a baking sheet, and a rubber spatula to spread your melted chocolate into an even layer. Once assembled and cooled to room temperature, you have a Valentine’s Day treat that’s ready to slice, package, and enjoy. It’s truly the perfect way to make something fun without much effort!

Easy Valentine’s Day Bark Recipe
Creating a Valentine’s Day bark is as simple as melting chocolate and adding your favorite toppings. It’s a great way to combine creativity and deliciousness into a single treat. Here’s how to make your own candy bark recipe step by step, so you’re all set for Valentine’s Day.
Preparing the Ingredients
Before you start, gather everything you’ll need and set up your workspace for a smooth process. Here’s how to prep:
Gather Ingredients:
- Choose your chocolate: Dark chocolate, milk chocolate, white chocolate chips, or even pink candy melts.
- Grab festive toppings like conversation hearts, Valentine’s Day sprinkles, or candy hearts.
- If you love a salty twist, add pretzel pieces or salty snacks for balance.

Prepare the Workspace:
- Line a baking sheet with parchment paper or wax paper to prevent sticking.
- Have a rubber spatula ready for spreading.

Get Your Chocolate Ready: You can use chocolate bars, white candy melts, or your favorite chocolate chips. Cut larger pieces into smaller chunks for faster and even melting.

Melting the Chocolate
Melting chocolate is a key step, and it’s easier than you think. Choose between a double boiler or your microwave. Here’s how you can get the best results:
Double Boiler Method:
- Fill the bottom pot with water and bring it to a simmer.
- Place a heat-safe bowl over the simmering water, ensuring it doesn’t touch the water.
- Add chocolate and stir continuously with a rubber spatula until smooth.
Microwave Method:
- Use a microwave-safe bowl for melting chocolate.
- Heat in 30-second intervals, stirring between each session. This prevents overheating, which can ruin the texture.
- Stop heating once the chocolate is silky and smooth.
Pro Tip: If using white chocolate chips or candy melts, add a drop of food coloring for a bright Valentine’s Day twist.

Creating Layers and Adding Toppings
Once your chocolate is ready, it’s time to create the bark. Here’s how to turn melted chocolate into a gorgeous Valentine treat:
Create a Smooth Layer:

- Pour the melted chocolate onto the prepared baking sheet.
- Spread it evenly with a rubber spatula or an offset spatula to form a large rectangle.

Place the cookie sheet in the fridge for 5 minutes to solidify.
While the chocolate is in the fridge, break some of your pretzel bows in half. Place all the pretzels to the side to use later.

Melt the pink, white, and red chocolate melting wafers in separate bowls

Take turns pouring small portions each color of melting chocolate over the brown chocolate.


Moving quickly use a toothpick or knife to drag the colors into each other horizontally, clean the knife and drag it again vertically to create a marble pattern.

Next sprinkle the candy coated chocolates, pretzel pieces, and sprinkles all over the chocolate. Then place the chocolate in the fridge for 10-15 minutes solidify.

Heat up a cup of water to make it hot and place it near(but not next to) the cookie sheet

Place the cookie cutter in the hot water to warm it up, quickly take it out using a fork and wipe it with a paper towel.

Press the warm cookie cutter into the chocolate on the cookie sheet to create heart shape cookie bark.

Repeat this step until you have cut out your desired number of hearts. You may need to re dip the cutter to keep it warm, so you can cut out all of your hearts.

Cooling and Storing
Once your bark is designed to perfection, allow it to cool and harden. Follow these steps:

- Cool on a Flat Surface: Place the baking sheet on a flat surface at room temperature. Avoid moving it around too much to keep the layers even.
- Quick Cooling Tip: If you’re in a rush, place the baking sheet in the refrigerator for 15–20 minutes. This speeds up the hardening process.
- Store Properly: Once the bark is firm, carefully break it into pieces. Store in an airtight container to keep it fresh. It’ll last for up to a week at room temperature – perfect for gifting or easy treats during Valentine’s week.
No need to stress about making a perfect design – the beauty of Valentine’s Day bark lies in its rustic, homemade vibe. Whether it’s for a party, a gift, or a movie night snack, this simple recipe is a fun way to spread a little love without any extra cost.

Variations of Valentine’s Day Bark
Valentine’s Day bark is a versatile treat that can be customized in dozens of fun and creative ways. Whether you’re looking for a vegan option, experimenting with different chocolates, or adding a salty twist for balance, it’s easy to turn this simple chocolate bark into a personalized dessert. Let’s explore a few ways you can mix it up!
Vegan Valentine’s Bark
Creating a vegan Valentine’s Day bark is simpler than you might think! Whether catering to dietary preferences or making it for the vegan chocolate lovers in your life, there are many fun options to try.
- Choose Vegan-Friendly Chocolate: Look for dark chocolate or semi-sweet chocolate chips labeled as vegan. Many brands now offer versions without milk solids. You can even try vegan white chocolate alternatives to recreate a creamy base.
- Dairy-Free Toppings: Use goodies like dried fruits (raspberries, strawberries, or apricots), crushed nuts, or vegan marshmallows. They’re easy to find at most local grocery stores and add plenty of texture.
- Additional Vegan Options: Want to stick with the classic festive theme? Pick dairy-free sprinkles and naturally colored candy hearts. Freeze-dried fruits or crushed coconut chips also make great additions.
- Healthy Twists: You can even incorporate nutrient-rich ingredients like chia seeds, pistachios, or pumpkin seeds for added crunch and flavor.
Use parchment paper or a silicone mat to prep your space and ensure your vegan bark stays mess-free!

Using Different Types of Chocolate
The type of chocolate you use for your Valentine’s bark can completely change the taste and look of the final product. Why stick to just one when you can blend or layer them?
- Dark Chocolate: A rich, bold choice with slightly bitter notes. Dark chocolate gives a sophisticated flavor profile and makes red and pink toppings pop. This is a go-to for chocolate lovers who prefer a less sweet treat.
- Milk Chocolate: It’s creamy, sweet, and widely enjoyed. Milk chocolate is softer in taste and pairs well with salty snacks like pretzel pieces or crushed potato chips.
- White Chocolate: The smoothest of the bunch, white chocolate bark allows food coloring to shine. Try swirling it with pink candy melts for eye-catching designs or adding a Valentine’s Day sprinkle mix for contrast.
Experiment with layers! Start with dark chocolate bark as your base, let it cool slightly, and then add melted white chocolate for a marbled effect. It’s as easy as using a butter knife or spatula to create eye-catching swirls.
Incorporating Salty Snacks
Sometimes the best way to elevate your candy bark recipe is by adding a salty twist. The contrast brings out the sweetness in the chocolate while offering extra crunch.
Here are some fun options to consider:
- Pretzels: Crushed pretzel pieces or sticks add that perfect salty pop. Plus, pretzels are sturdy enough to hold up as a topping and blend beautifully with melted chocolate.
- Potato Chips: For something unique, sprinkle crushed potato chips over your chocolate layer before it sets. The light, crispy texture is an unexpected surprise!
- Salted Nuts: Crushed peanuts, almonds, or pistachios create a crunchy bite and a touch of savory flavor that pairs well with every chocolate type.
- Popcorn: Want a movie-night vibe? Toss some salted popcorn onto your bark for a playful and bold addition. Make sure the popcorn is plain and salted for the best results.
Layer your salty snacks strategically: start with the larger pieces like pretzels, then sprinkle smaller bits like nuts or sea salt flakes on top. It’s a great way to ensure every piece of Valentine’s chocolate bark gets a satisfying sweet-and-salty combo.
Valentine Heart Bark Recipe
Equipment
- Equipment
- Measuring cups
- Cup/glass to Hold the Hot Water https://a.co/d/akBJCpY
- Spatula
- Microwave Safe bowls
- Parchment Paper
- Cookie Sheet https://a.co/d/cz4vBK7
- Heart Cookie Cutters https://a.co/d/15m70kg
Ingredients
- 4 Ounces Pink Melting Chocolate Wafers https://a.co/d/aHlz7NU
- 4 Ounces Red Melting Chocolate Wafers https://a.co/d/dJG0y0X
- 4 Ounces White Melting Chocolate Wafers https://a.co/d/hq6gnZX
- 10 Ounces Brown Melting Chocolate Wafers https://a.co/d/04lHxSf
- Pretzel Bows
- Valentine Heart Sprinkles https://a.co/d/5etATEn
- Edible Glitter https://a.co/d/9C5QHLb
Instructions
- -Line the cookie sheet with parchment paper.
- -Melt the brown chocolate melts in a microwave safe bowl in 30 second intervals until the its liquid and smooth.
- -Pour the chocolate over the cookie sheet and use a spatula to spread it out evenly across the parchment paper.
- -Place the cookie sheet in the fridge for 5 minutes to solidify.
- -While the chocolate is in the fridge, break some of your pretzel bows in half. Place all the pretzels to the side to use later.
- -Melt the pink, white, and red chocolate melting wafers in separate bowls following the same melting instructions as above.
- -Take turns pouring small portions each color of melting chocolate over the brown chocolate.
- -Moving quickly use a toothpick or knife to drag the colors into each other horizontally, clean the knife and drag it again vertically to create a marble pattern.
- -Next sprinkle the candy coated chocolates, pretzel pieces, and sprinkles all over the chocolate.
- -Place the chocolate in the fridge for 10-15 minutes solidify.
- -Heat up a cup of water to make it hot and place it near(but not next to) the cookie sheet.
- -Place the cookie cutter in the hot water to warm it up, quickly take it out using a fork and wipe it with a paper towel.
- -Press the warm cookie cutter into the chocolate on the cookie sheet to create heart shape cookie bark.
- -Repeat this step until you have cut out your desired number of hearts. You may need to re dip the cutter to keep it warm, so you can cut out all of your hearts.
- -Spray the Hearts with edible glitter for extra flare.
- -Place the bark on a flat surface, Serve and Enjoy!
Notes
-If you have a tiny heart cutter you can use that to cut out more hearts from the chocolate left over on the board.
-You can repeat the process with all your left over chocolate for more hearts. Just gather all the left over chocolate, remelt it on the parchment paper, put it in the fridge to solid and cut more hearts out with the warm cookie cutter.
-The bark can be stored in in a ziplock bag or an air tight container for up to 4 days. They can be placed in the freezer for 2 weeks but be warned the pretzel texture may change when they come to room temperature.
Presentation Ideas for Valentine’s Day Bark
Making Valentine’s Day bark is fun, but presenting it beautifully takes it to the next level. Whether you’re gifting it or serving it at a gathering, a thoughtful presentation adds an extra sprinkle of love.
Packaging for Gifts
Transform your Valentine’s Day bark into a gift that wows by focusing on creative packaging. It’s all about combining practicality with charm. Here are some simple yet effective ideas:
- Wrap in Wax Paper: Start by cutting large squares of wax paper. Carefully wrap individual pieces or stacks of bark. Tie them with a colorful ribbon or baker’s twine for a cute, rustic feel.
- Decorative Boxes: Grab small decorative boxes from your local craft supply store or reuse sturdy candy boxes. Line them with parchment paper for a clean finish before adding the chocolate bark.
- Mason Jars with a Twist: Fill small mason jars with bark pieces and decorate the lid with festive fabric or a heart-shaped tag. Mason jars offer a chic, reusable option.
- Cellophane Bags: Perfect for quick packaging! Slide bark pieces into clear or lightly tinted bags and seal them with themed stickers or metallic twist ties.
- DIY Heart Boxes: If you’re feeling crafty, fold paper or cardstock into heart shapes to create customized containers. Pinterest has free templates to get you started.
By using materials like wax paper, ribbons, and festive boxes, you can turn your simple chocolate bark into an eye-catching Valentine gift.

Serving Suggestions
Valentine’s Day bark isn’t just for gifting – it’s also a delightful treat to share at events. The way you serve it can make all the difference in creating a memorable dessert presentation.
- Arrange on a Dessert Table: Place bark pieces on a flat surface like a marble slab, wooden serving board, or decorative tray. Let the vibrant colors of candy hearts, sprinkles, and pink candy melts pop.
- Tiered Stands: Use a tiered cake stand to stack layers of white chocolate bark, dark chocolate bark, or other variations. This adds elegance while saving table space.
- Individual Cups: Pre-portion bark into small paper cups or silicone muffin molds for a grab-and-go option. Guests will appreciate the ease of individual servings.
- Mix-and-Match Plates: Set out separate plates featuring different bark flavors: dark chocolate, milk chocolate, and white chocolate chips. Add a sign to label each type for guests.
- Heart-Shaped Plates or Bowls: Display bark pieces in heart-shaped dishes for a themed touch that’s perfect for Valentine’s Day parties.
- Snack Cones: Roll colorful paper or parchment into cones, then fill them with bark for a whimsical twist.
These ideas are not just practical but also aesthetic, turning your Valentine’s Day chocolate bark into both a tasty and visually appealing treat. Whether you’re hosting a party or setting up a cozy movie night snack station, these tips will make your presentation stand out.
Final Thoughts
Making Valentine’s Day bark is such a fun and easy way to celebrate the holiday! I love how customizable it is—you can make it as simple or fancy as you want. Whether you’re gifting it to friends, sharing it with family, or just treating yourself, this sweet and colorful treat is always a hit. Plus, it’s so quick to put together that you can whip up a batch anytime. Give it a try this Valentine’s Day, and I bet it’ll become one of your favorite holiday traditions too!


Looking for more Valentine recipes? Check out
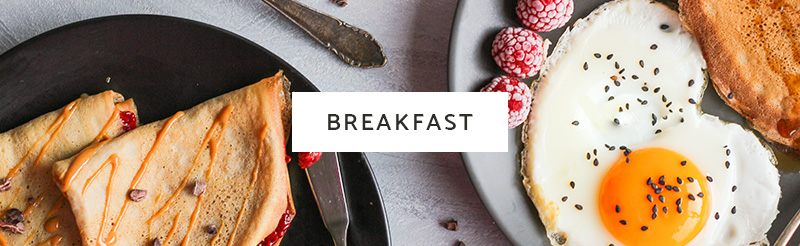
Breakfast ideas for Valentines Day
 Strawberry Crunch Cheesecake
 How to Make a Valentine's Day Breakfast Charcuterie Board That Will Wow Your Loved Ones